2 weeks ago
Sunday, June 21, 2015
At Last, Tile
It's been a long road getting the shower ready to start tiling. We've done demo, put in new plumbing, installed cement board, leveled the floor, added niches, installed a waterproofing membrane, and done a bunch of other little fixes within these steps.
At long last, we've gotten to the point of actually adding tile!
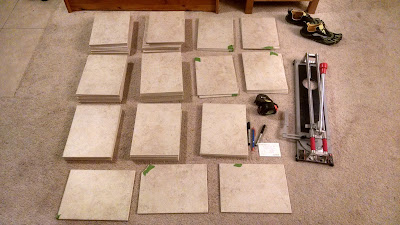
Before we started tiling, we sorted the tile. Any tiles that were broken to the point where we couldn't even use them for cuts were rejected, along with any others that we didn't like for some reason. If tiles had a chip or crack near the edge, we marked the flaw with painters tape to remind us which part of the tile to cut away when we made our measurements.
Since we're using ceramic tile that has a stone look, there are patterns used throughout the tile. We sorted all of the tile by pattern and put each in a separate pile. This helps us make sure that we don't have repeating patterns next each other as we install them.
The hardest part of getting tile on a wall is starting the first row at the bottom. This row absolutely has to be level because all of the other rows will build on it. Since the shower pan slopes towards the drain, it's not a level surface to build from. To solve this problem, J built a wooden base to put on the shower pan that's level across the top.
Once this wooden shelf was added, it made it easy to get the first row of tile perfectly level.
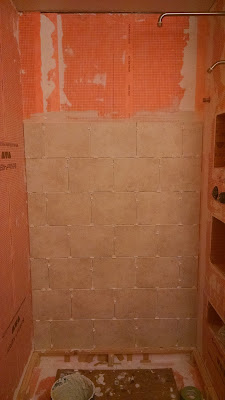
After the first row was up and we got measurements for the cut pieces, we got into a rhythm. I am the official chooser of which tile pattern goes where as well as the measurer of cut pieces. J is the tile saw operator (because it freaks me out) and mortar man. And Allie is the licker of interesting home improvement supplies.
And just like that, the tile is going up!
Subscribe to:
Post Comments (Atom)


No comments:
Post a Comment